
How to do a bulk cross-post in OneCart?
Publish many listings onto another marketplace at once. OneCart AI fills in the destination category and required attributes for each listing, and you review every choice before anything goes live.

Publish many listings onto another marketplace at once. OneCart AI fills in the destination category and required attributes for each listing, and you review every choice before anything goes live.
Bulk cross-post publishes a batch of listings onto another connected marketplace in one go. OneCart AI works out the destination category, brand and mandatory attributes for each listing individually — and nothing publishes until you’ve reviewed it.
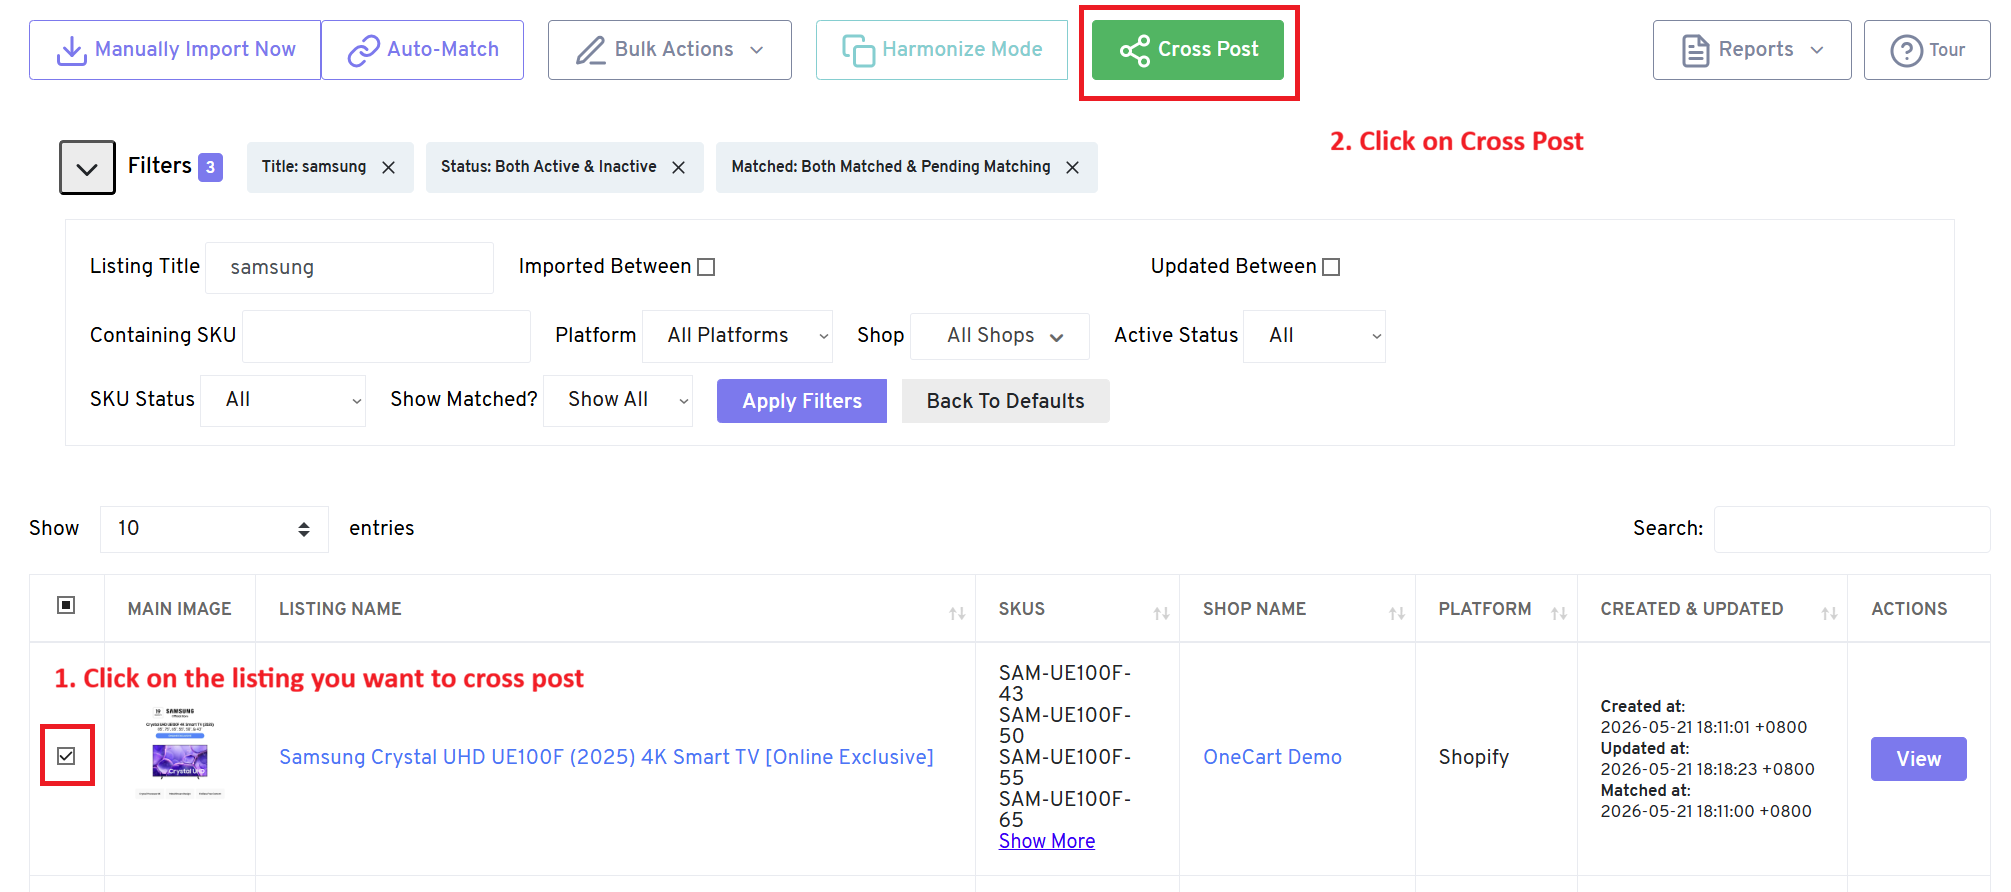
From the left-hand menu, go to E-commerce Listings → Manage Listings → View All Imported Listings (app.getonecart.com/imports).
Select the listings you want to transfer. Tick them individually, or use the header checkbox to take everything on the page. The filters above the table help you narrow down first — by title, platform, shop, or matched status.
Click Cross Post.
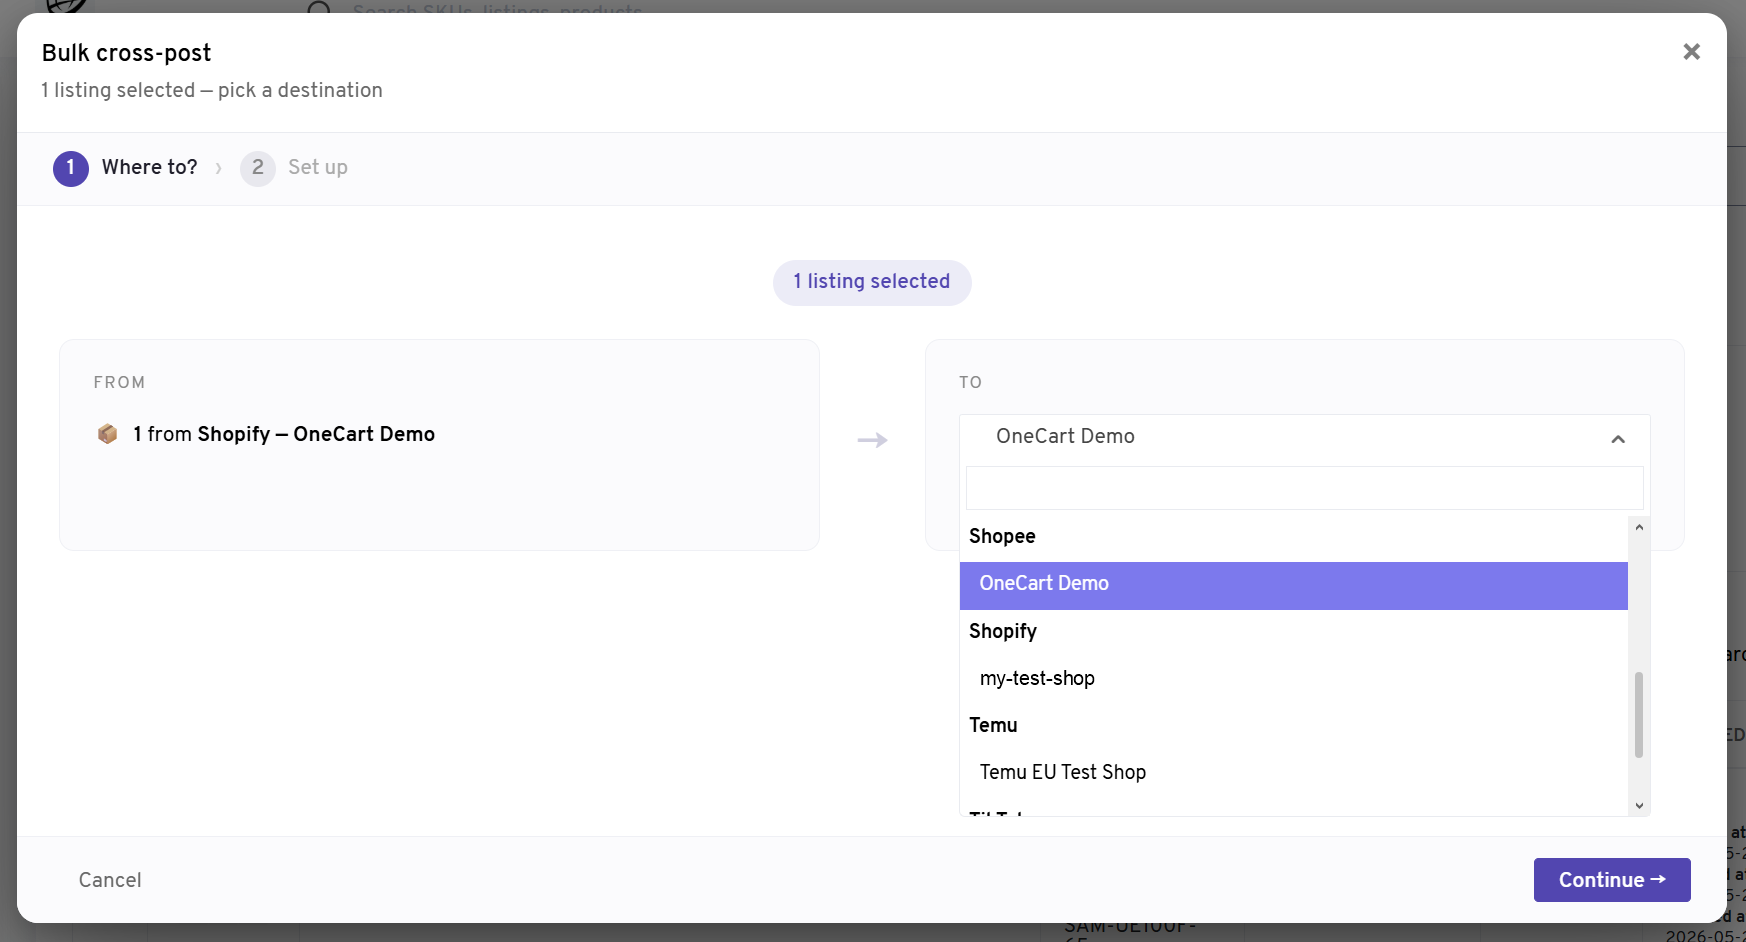
The second step, Set up, gives you two modes.
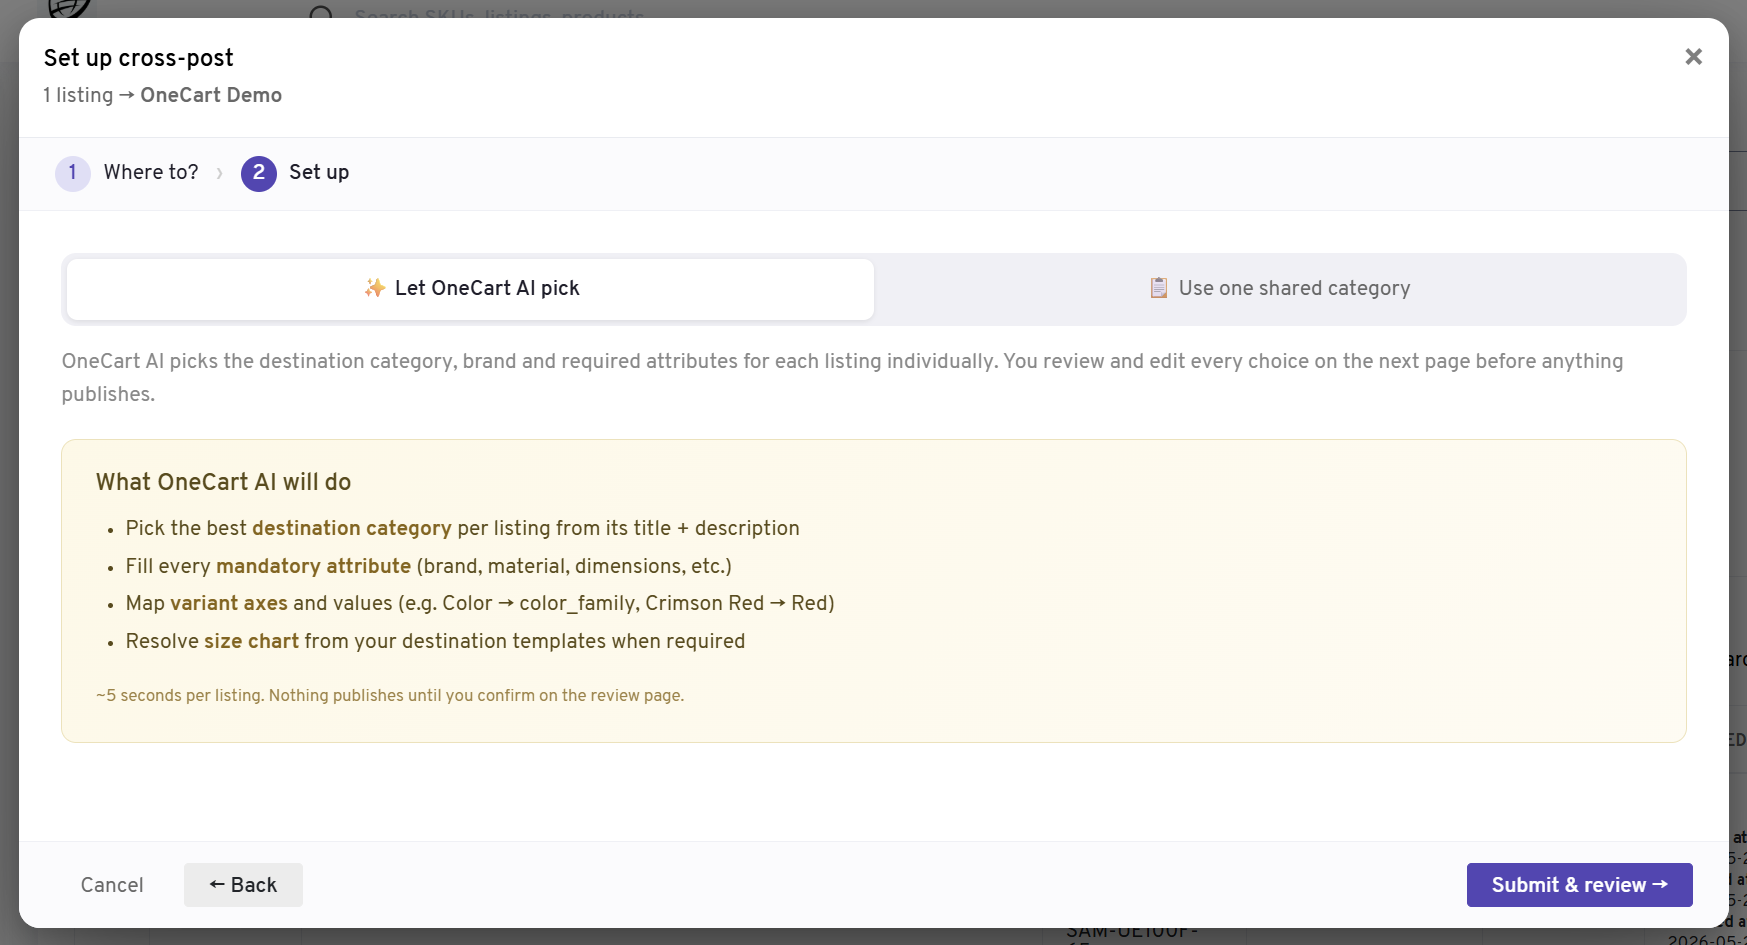
OneCart AI goes through each listing one at a time and works out:
color_family, Crimson Red → Red)This takes roughly 5 seconds per listing. AI mode is available for Lazada, Shopee, Shopify, TikTok, Amazon and Temu destinations. If you pick a destination that isn’t supported yet, this option is disabled and you’ll use the shared form instead.
Every listing in the batch gets the same category and the same attributes, which you fill in once on a platform-specific form. Good when your batch is all one type of product — 40 t-shirts, say — and you’d rather set the category yourself than have it picked per listing.
When you’ve chosen, click Submit & review →. You can close the modal and let it keep working in the background.
This is the important part: submitting does not publish. You land on the review page, where each listing appears as a card as soon as it’s ready. The counters across the top track the batch — Ready, Preparing, Prepare failed, Skipped and Published — so you can start reviewing finished cards while the rest are still being prepared.
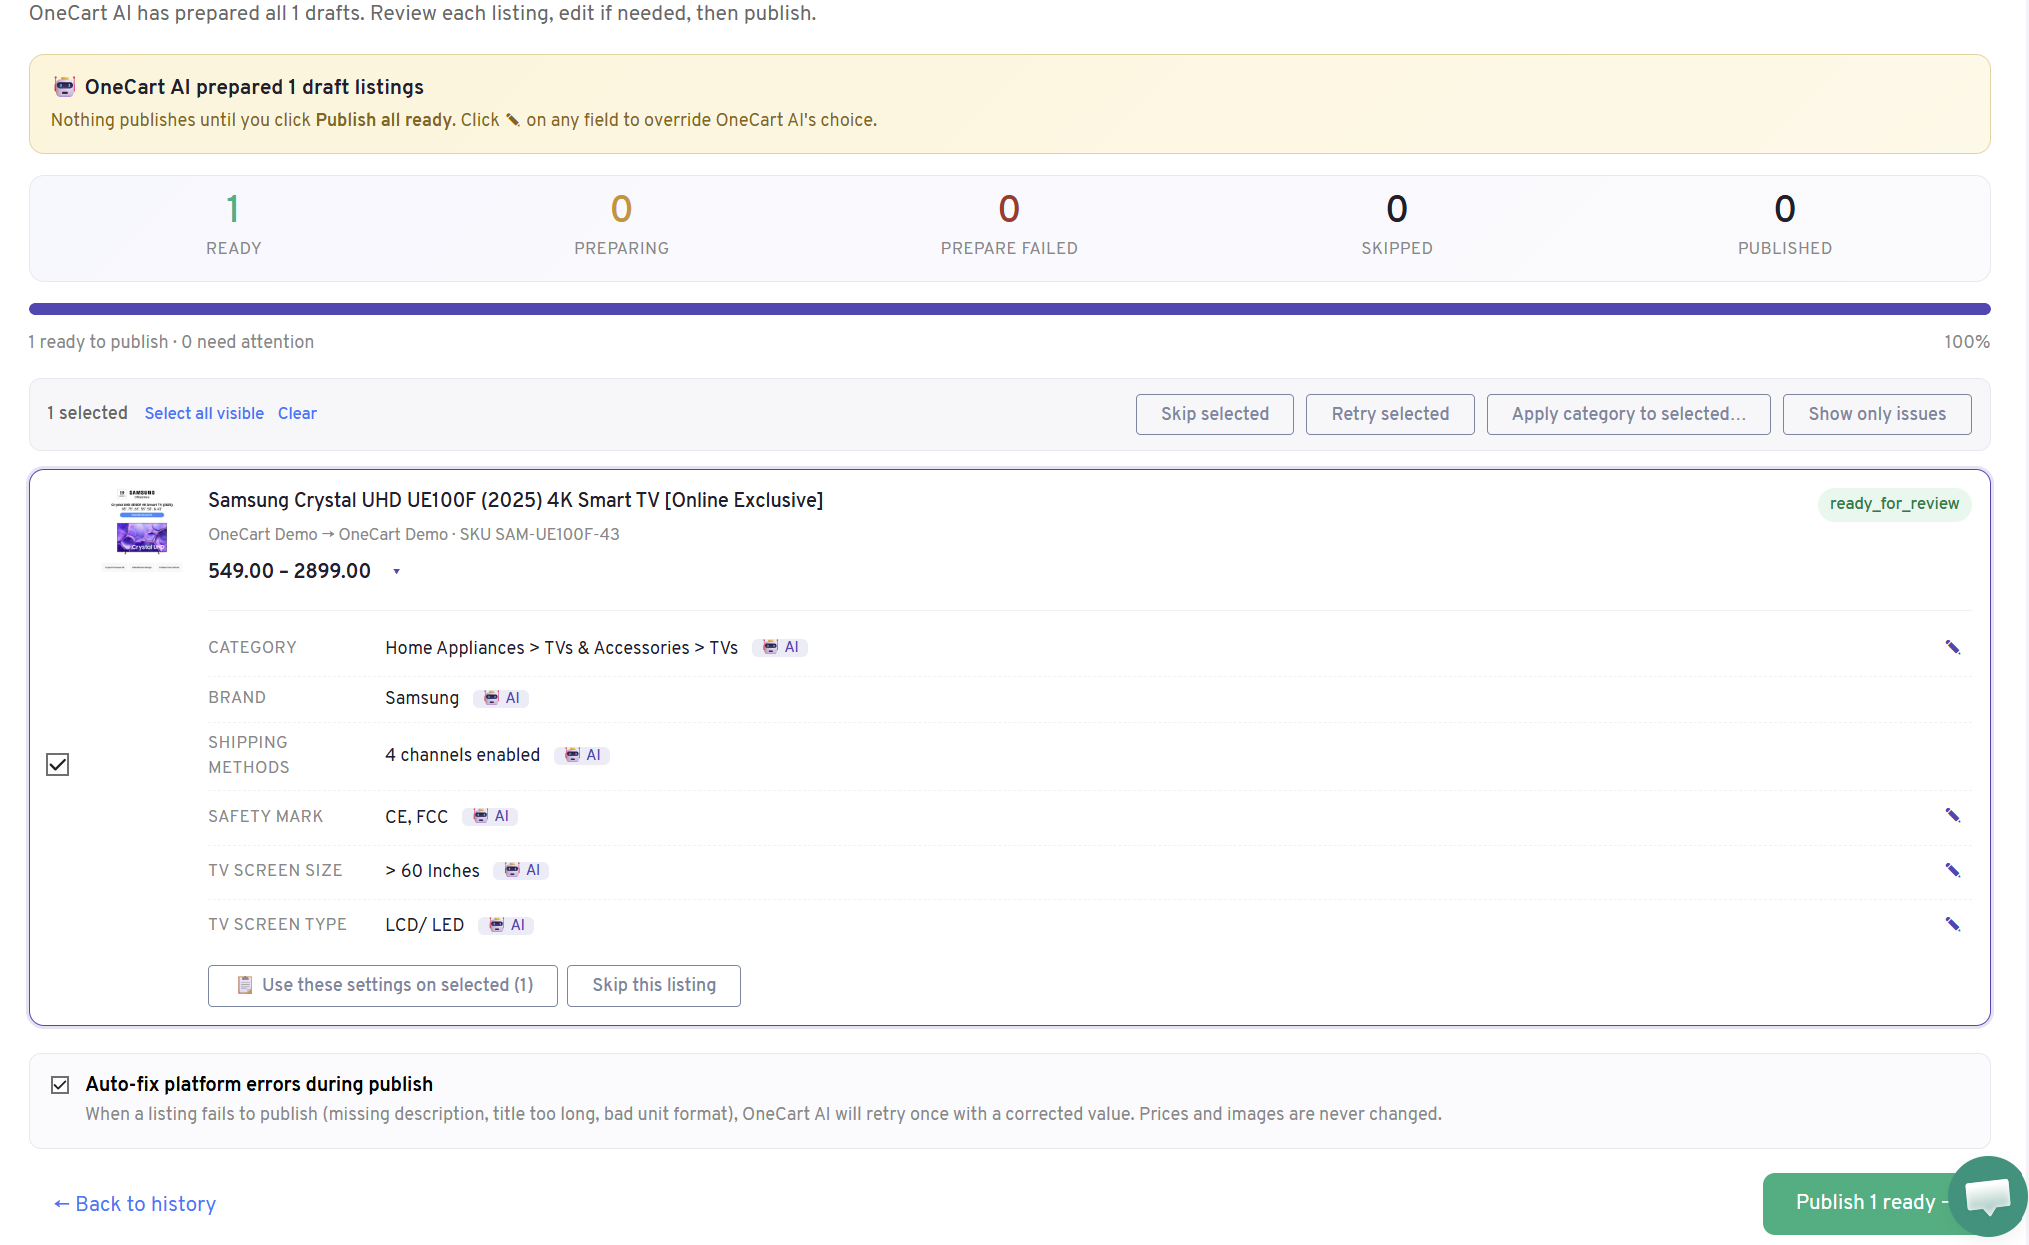
Every value OneCart AI chose is tagged with an AI badge, so you can see at a glance what was decided for you.
On each card you can:
Across the whole batch you can:
Some platforms ask for extra details here, and the card will prompt you for them — a GTIN (or a GTIN exemption), a size chart, or variant axes for Temu.
At the bottom of the review page there’s an Auto-fix platform errors during publish checkbox, on by default. If a listing is rejected for something mechanical — missing description, title too long, a bad unit format — OneCart AI retries once with a corrected value. Your prices and images are never changed. Untick it if you’d rather see the raw failure and fix it yourself.
When you’re happy, click Publish all ready →. Only then do the listings get sent to the destination.
Publishing runs in the background and can take a few minutes. You can leave the page — OneCart emails you when the batch finishes.
Once done: