How to Add and Manage Product Images in OneCart
Learn how to upload, reorder, delete, and import product images in OneCart — including how to pull images from your connected marketplace platforms.
Learn how to upload, reorder, delete, and import product images in OneCart — including how to pull images from your connected marketplace platforms.
Product images in OneCart serve as your central image library. Once uploaded to a product, these images can be pushed to any connected platform (Shopee, TikTok, Lazada, Shopify, WooCommerce, and Zalora) — so you only need to manage your images in one place.
There are three ways to add images to your products:
Go to Inventory > View Inventory > View/Edit Parent Products.
Find the product you want to add images to, and click Edit in the Actions column.

On the Product details page, click Choose Files under “Add Images” to select files from your computer.
Tip: You can select multiple files at once — hold Shift or Ctrl while clicking to select several images, then press Open.
Click Update Product to save your images. Your uploaded images will appear on the right-hand side of the product page.
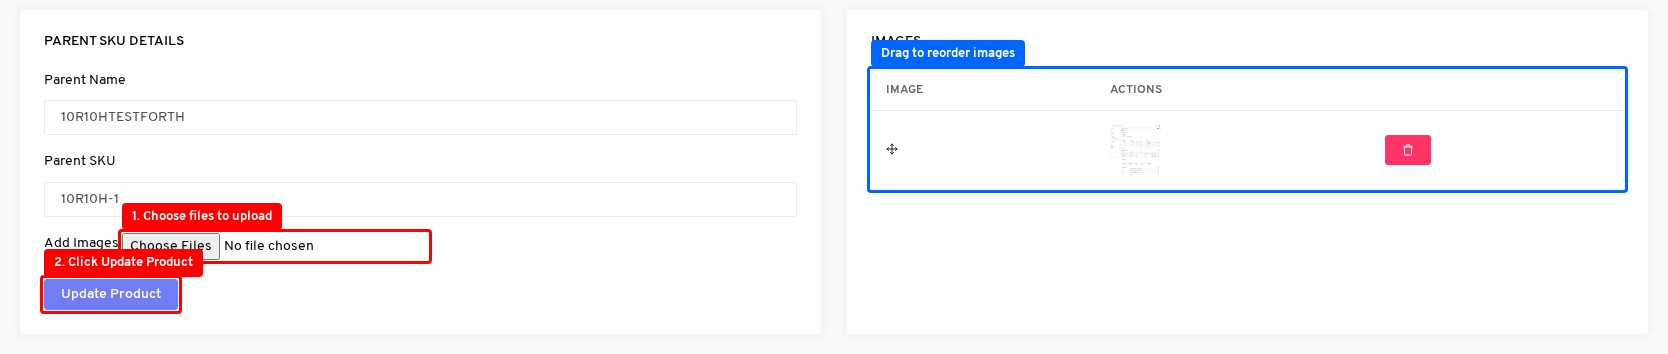
After uploading, you can drag and drop images to reorder them on the right side of the edit page. The first image will be used as the main product image — simply drag the image rows into your preferred order. Changes are saved automatically.
To remove an image, click the red delete button next to the image you want to remove.
If your products already have images on a marketplace platform, you can pull them directly into OneCart instead of re-uploading.
Go to Inventory > View Inventory > View/Edit Parent Products and click into the product.
On the product page, look for the Add images from platform dropdown button. This appears when the product does not yet have images and has linked listings on connected platforms.
Click the dropdown and select the platform you want to import images from:
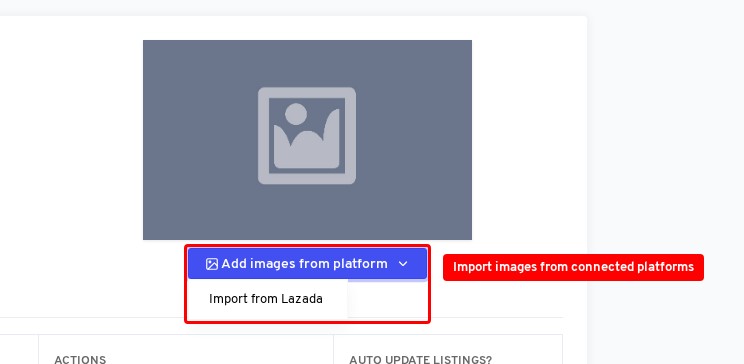
OneCart will fetch the images from that platform’s listing and add them to the product.
If you have a large number of products that need images, the OneCart team can batch upload them for you.
SKU-001.jpg)For more details, see Product Images (Batch Upload).
On the product page (Products > Show), your images are displayed with a zoom-on-hover viewer. Click on any thumbnail to view the full-size image. If there are more than 4 images, click +N more to open the full gallery modal.
To get an overview of image usage across your entire catalogue, go to Advance > Health Check > Image Summary.
This page shows:
For more details, see What is the Image Summary page?
Once your products have images in OneCart, you can push those images to your marketplace listings — update images on Shopee, TikTok, Lazada, Shopify, WooCommerce, and Zalora all from one place. See How to Update Listing Images on Platforms.