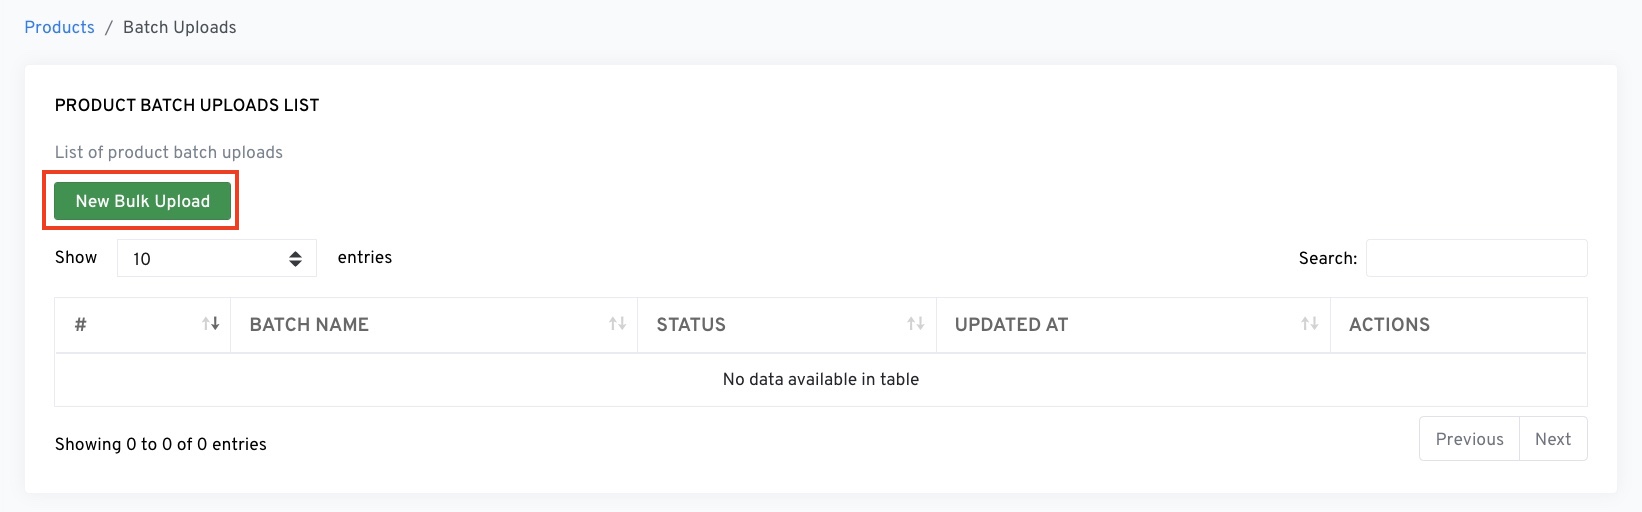
Bulk Upload Excel to Create or Edit Inventory
Have a list of new products that you want to add in OneCart or edit a list of products? Here is how you can do it quickly using Excel or CSV bulk upload.
Have a list of new products that you want to add in OneCart or edit a list of products? Here is how you can do it quickly using Excel or CSV bulk upload.
Important Note: If you are already syncing inventory, any inventory quantity change will IMMEDIATELY push the new quantity level to all your linked platforms. Please double-check your values BEFORE uploading. If you don’t wish to update quantity, you can either toggle off inventory sync temporarily before uploading, OR delete the quantity column in your spreadsheet. Please contact Support for assistance if you are unsure.
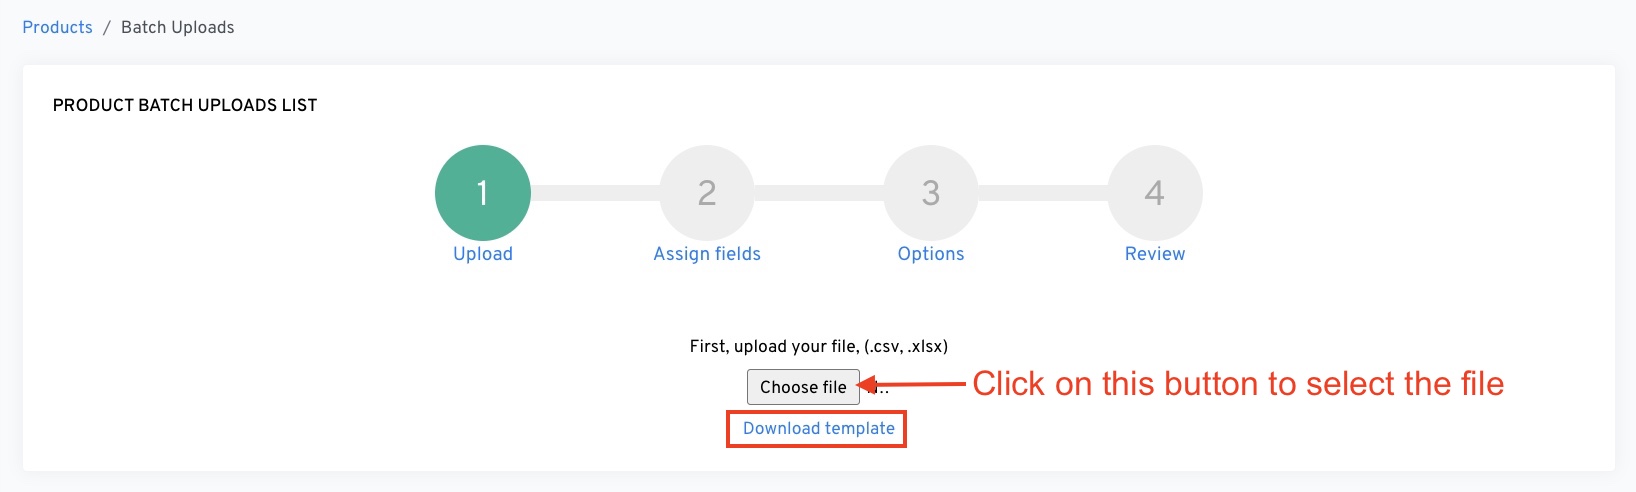
Click on Download template to get the Excel template with all available fields.
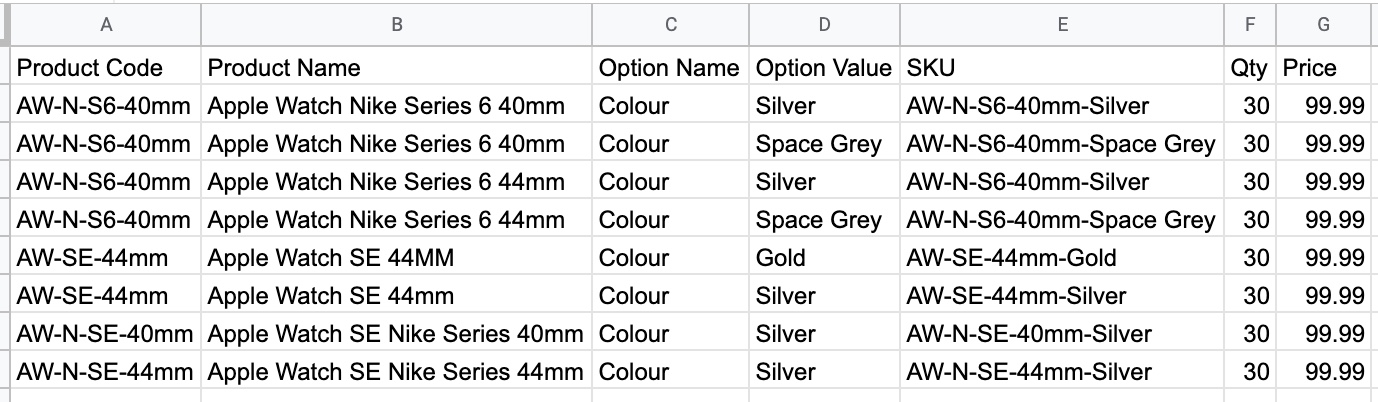
After filling out the fields, save your file in .csv or .xlsx format.
Different operations require different columns:
| Column | Required? | Description |
|---|---|---|
| Variant SKU | Required | Unique identifier for the item |
| Product Code | Required | Groups variants under a parent product |
| Product Name | Optional | Name of the parent product |
| Quantity | Optional | Starting inventory count |
| Retail Price | Optional | Selling price |
| Column | Required? | Description |
|---|---|---|
| Variant SKU | Required | Must match an existing SKU in OneCart |
| Product Code | Not needed | SKU alone identifies the item |
| + Any field to update | At least one | Only include columns you want to change |
Tip: When updating existing items, you only need the Variant SKU column plus the field(s) you want to update. For example, to update just buyer categories, your file only needs two columns: Variant SKU and Buyer Category.
Click Choose File to select your spreadsheet.
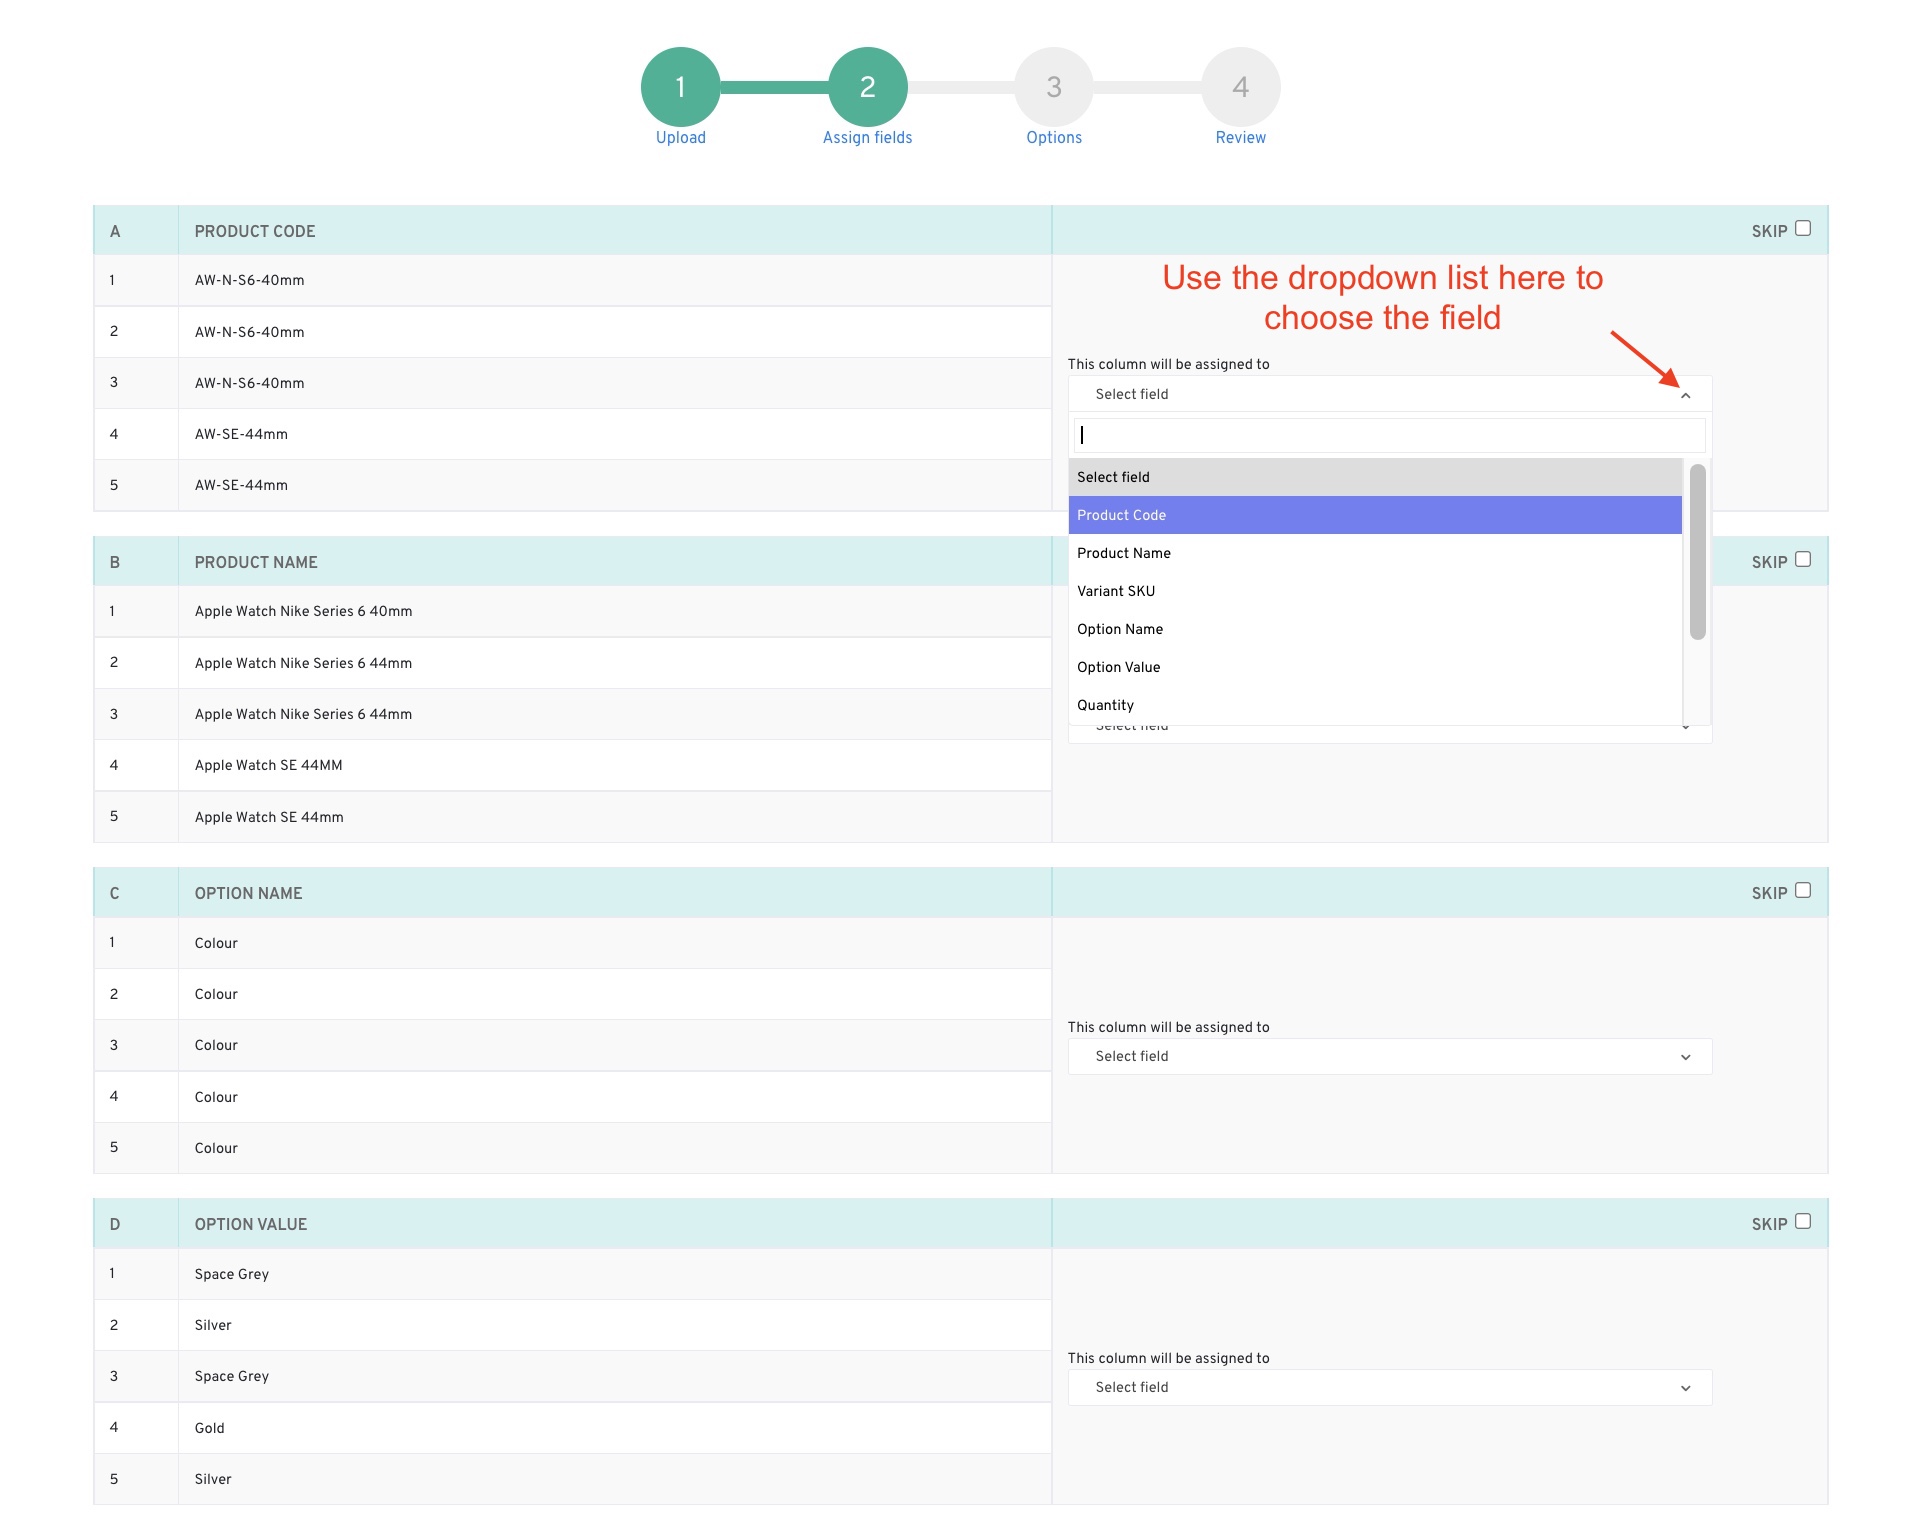
Map each column from your spreadsheet to the corresponding OneCart field. Use the dropdown to select the correct mapping.
| Your Column | Maps To | Description |
|---|---|---|
| Product Code | Product Code | Parent product identifier |
| Product Name | Product Name | Parent product name |
| Variant SKU | Variant SKU | Unique item identifier |
| Option Name | Option Name | Variant attribute (e.g., “Size”) |
| Option Value | Option Value | Variant value (e.g., “Large”) |
| Quantity | Quantity | Inventory count |
| Retail Price | Retail Price | Selling price |
| Unit Cost Price | Unit Cost Price | Your cost per unit |
| Reserve Qty | Reserve Qty | Safety stock to hold back |
| Brand | Brand | Product brand (auto-creates if new) |
| Buyer Category | Buyer Category | Product category (auto-creates if new) |
| Bin Location | Bin Location | Warehouse location |
| Details | Details | Additional product info |
When you include Brand or Buyer Category columns:
Select how to handle rows that match existing SKUs:

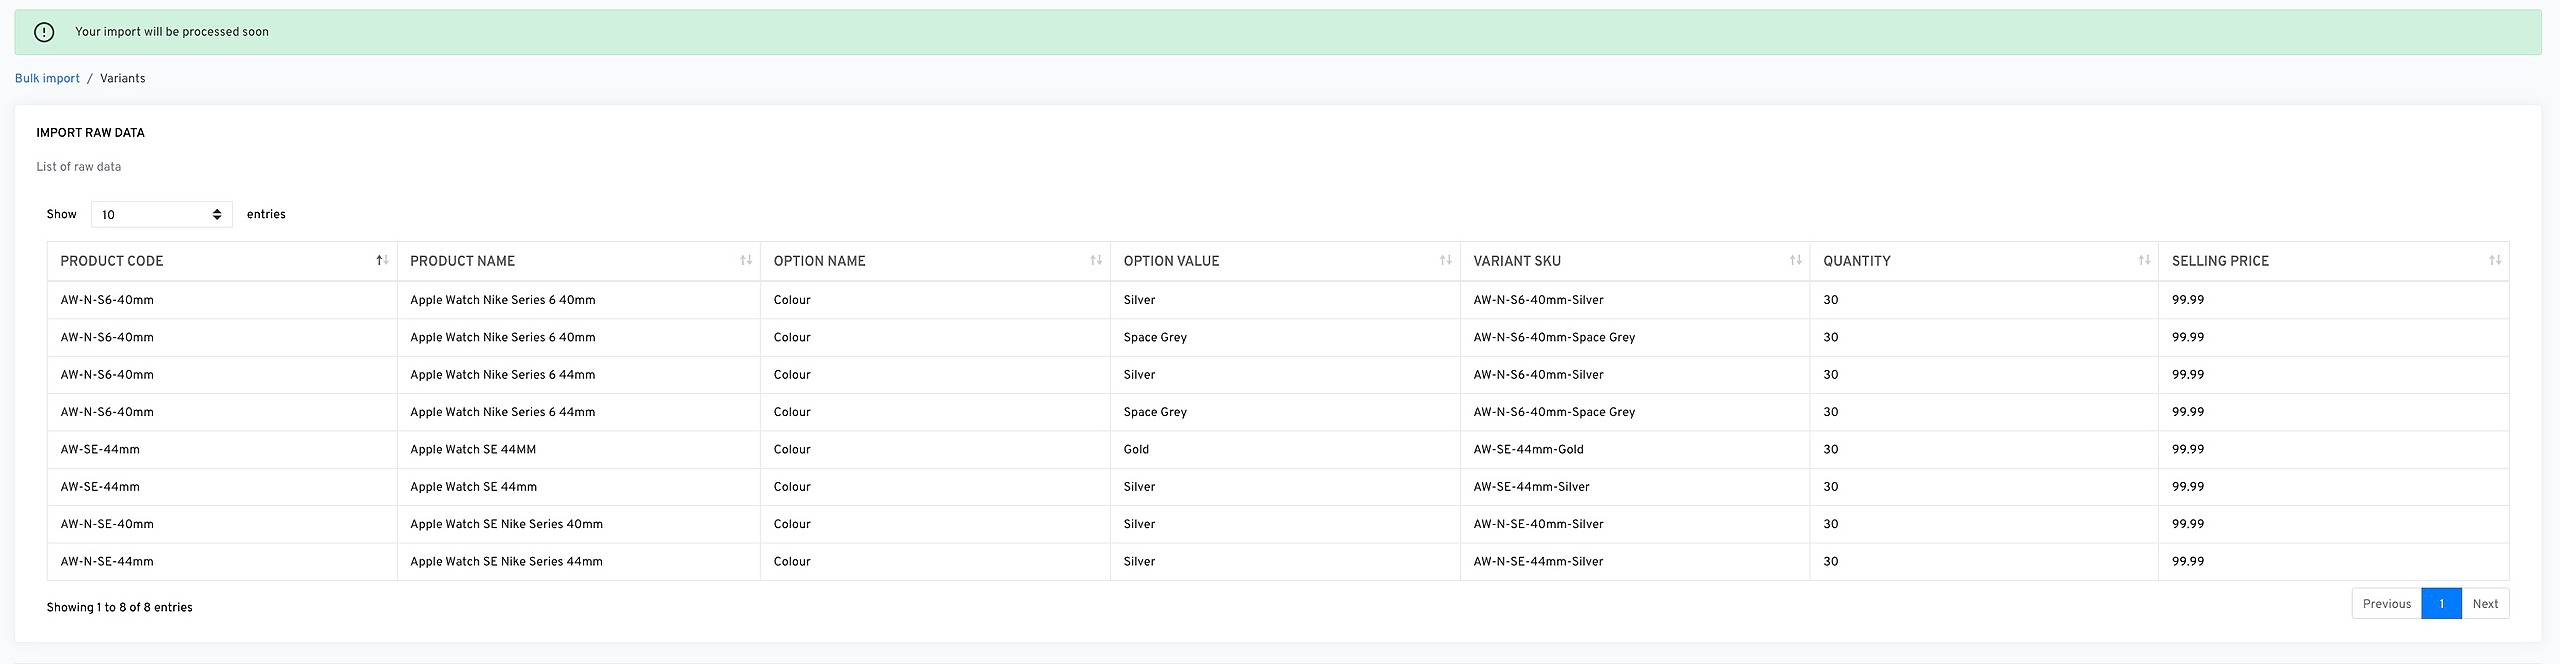
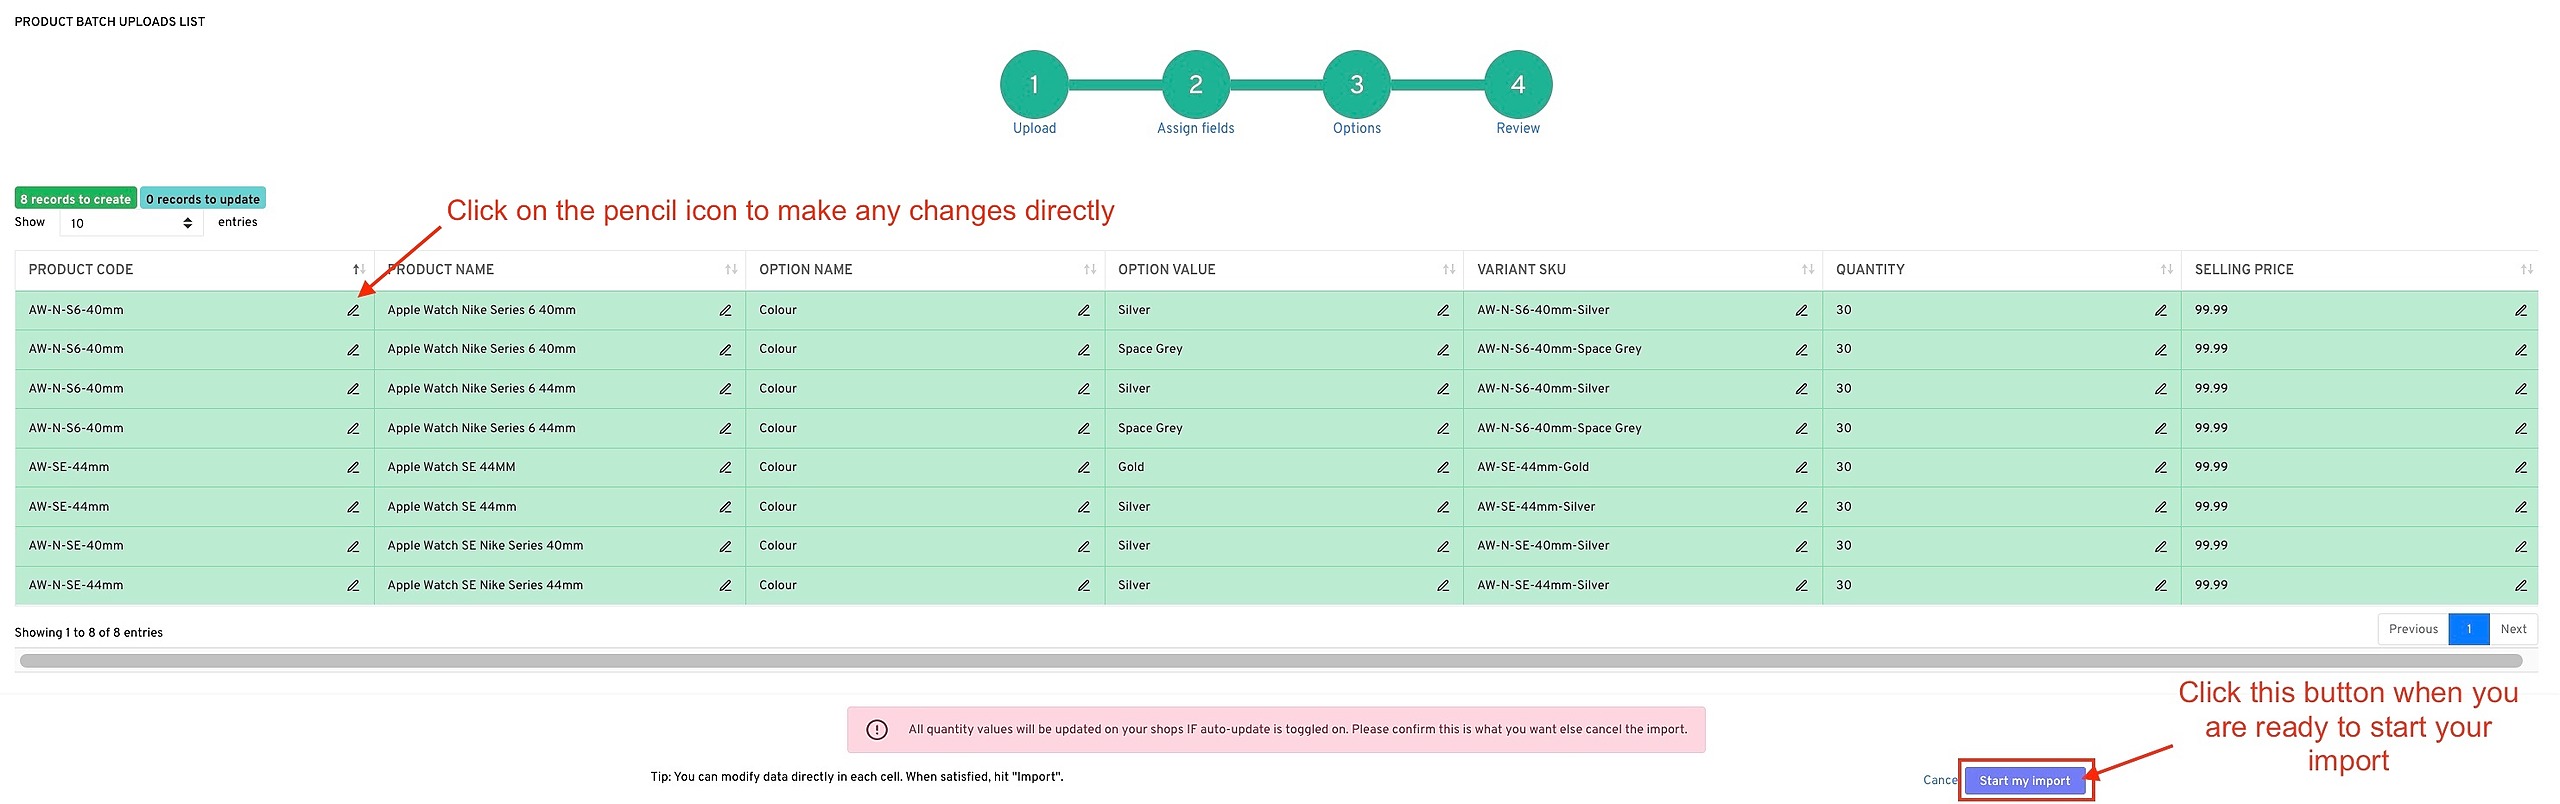
Review your data before importing. You can edit individual cells by clicking the pencil icon.
Important: Verify that:
Click Start my import when ready.
Your import will process in the background. You’ll receive an email notification when complete.